It’s cool to make an old-fashioned fan controlled by temperature, isn’t it? When the surface temperature of an object or the temperature in an area is higher than a preset value, your traditional fan will turn on automatically to cool the object or the room. Just with a very cheap Sonoff temperature sensor and a low cost Sonoff smart switch, you can quickly DIY such a smart temperature controlled fan. It can not only be controlled by temperature, but also can be remotely controlled by your phone or table via WiFi.
In this tutorial, I’ll show you how to DIY a smart temperature activated fan with an old-fashioned fan.
Gadgets:
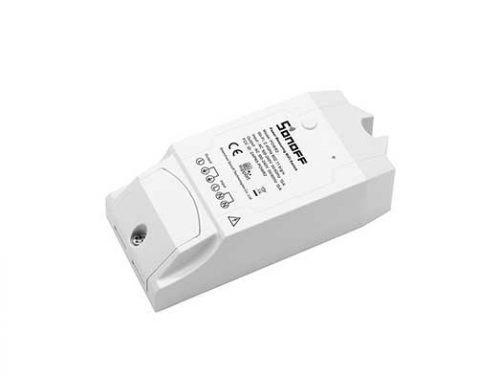
Sonoff TH
Sonoff AM2301 Sensor – a fan temperature controller
An old-fashioned fan
A power plug
An android or iOS phone
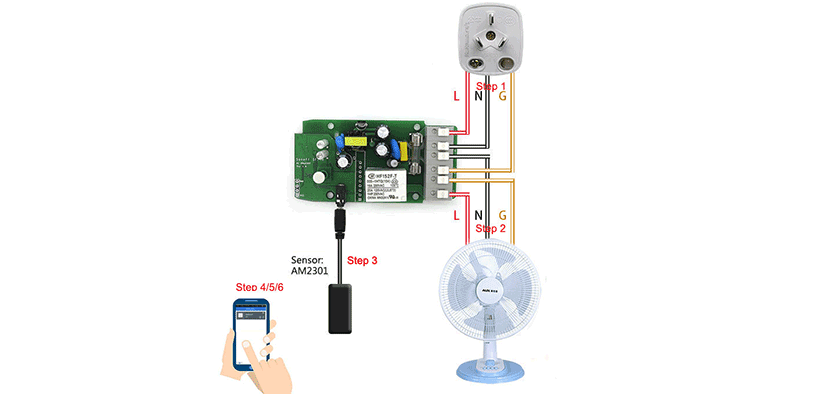
Step 1: Wire a Plug
Connect the live wire of the power plug to the live terminal of Sonoff TH.
Connect the neutral wire of the power plug to the neutral terminal of Sonoff TH.
If it’s a three pin plug, you need to connect the earth wire of it to the earth terminal of Sonoff TH.
Step 2: Connect the fan to Sonoff TH.
The way is the same as that of Step one.
Respectively connect the live, neutral or earth (if any) wire of the fan to the correct screw terminals of Sonoff TH.
Step 3: Plug Sonoff sensor into Sonoff TH.
There are two Sonoff sensors, AM2301 and DS18B20. The former can measure temperature and humidity but it’s non-waterproof, while the latter is waterproof but it can only measure temperature.
Just according to your need, select the right Sonoff sensor to plug to Sonoff TH. Here, I take AM2301 for example.
Step 4: Download and install E-WeLink
E-WeLink is an Android or iOS APP. You can use it to set the temperature boundary conditions for Sonoff TH and then control fan by temperature .
After installation, launch E-WeLink and register a new account, then log in.
Step 5: Add Sonoff TH to E-WeLink
Hit the “Add device” button in this APP, and then press and hold the “Set” button of Sonoff TH for a few seconds. Select your WiFi account and enter password. Name your device,lastly, click “ok”.
Step 6: Set the temperature boundary conditions
You’ll notice this APP can show you the real-time temperature value. Just click the device to set the temperature boundary conditions. Here, I make the temperature >= 35 ℃ (Turn On) and <=30 ℃ (Turn Off).
Note that you have to keep your Sonoff TH power supply plugged in all the time.
Ok, now, a great fan with temperature control is done. When the temperature is higher than the value you set up, the fan will launch automatically. Also, you can turn on or turn off the fan on your phone via WiFi wherever you are. By the way, Sonoff TH has a timing function.