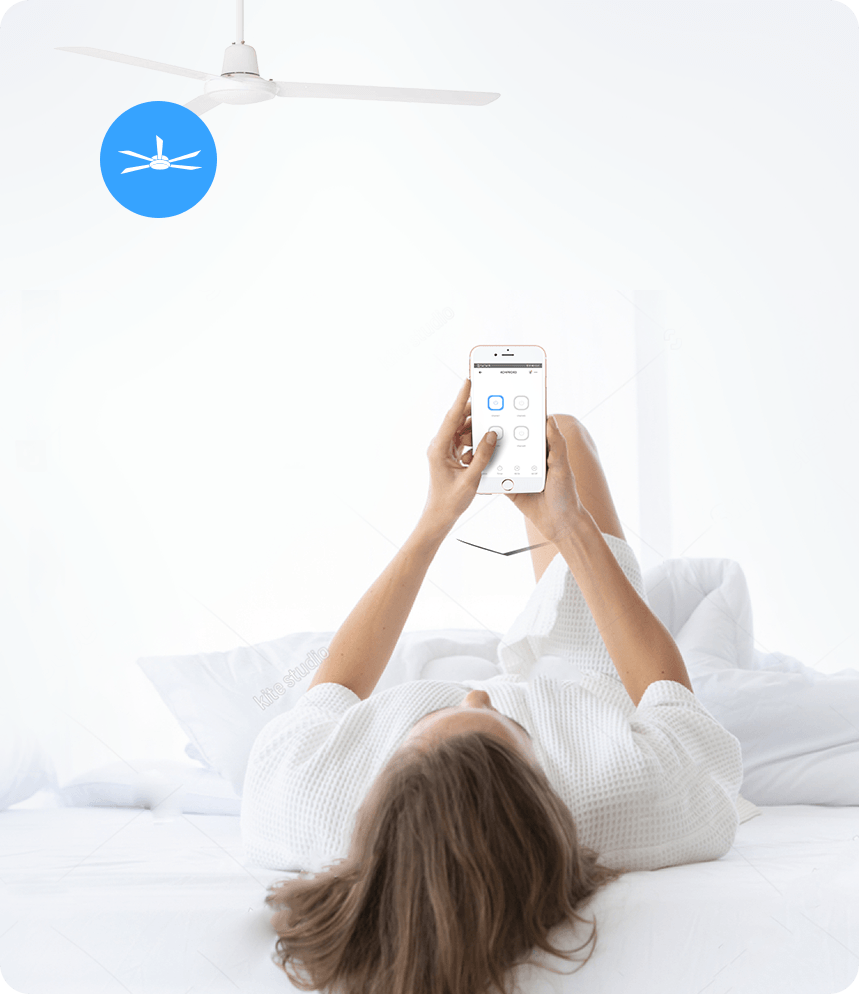
Device Pairing Instruction
Switch the Device into Pairing Mode
After powering on, the device will automatically enter the “Quick Pairing Mode”(Touch) during the first use.
The LED indicator of the device will blink like this:
If the LED indicator blinks in other ways, please press the paring button for 5 seconds to switch the device into
“Quick Pairing Mode” (Touch)
Note:
1. Press the button once, the device will quit the pairing mode.
2. If the device is not paired, it will quit pairing mode after 3 minutes.
Add the Device in eWeLink
1. Launch eWeLink APP in the mobile phone.
2. Click ”+” icon at the middle bottom of interface.
3. Select “Quick Pairing” for adding device.
4. Choose the WiFi network that the device will connect with.
User Tips: Before choosing the WiFi network, location services should be turned on and location permission should be allowed.
5. Enter the correct WiFi password and click “Next”.
6. Wait for eWeLink to search for the device.
7. eWeLink finds the device.
8. Name the device and group it.
9. Success.
Note:
1. The device only works with 2.4GHz WiFi.
2. If the router is working in dual-band (2.4GHz & 5GHz), please upgrade the eWeLink app to V4.0.0 or above.
3. The Pairing will fail if a wrong WiFi password is input.
4. The device shall get close to router for a good transmission signal condition while pairing.
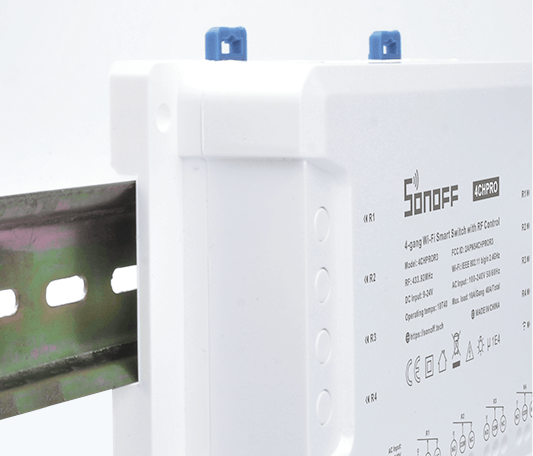
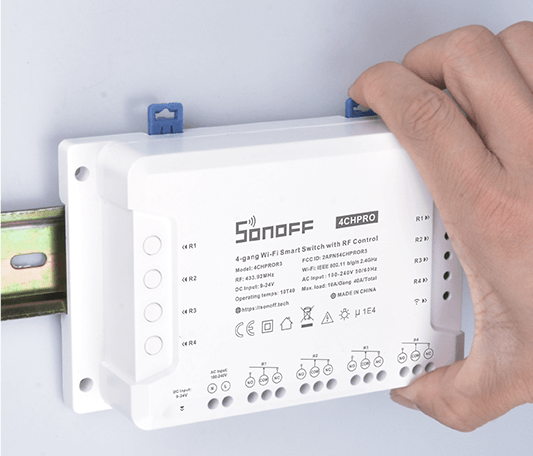
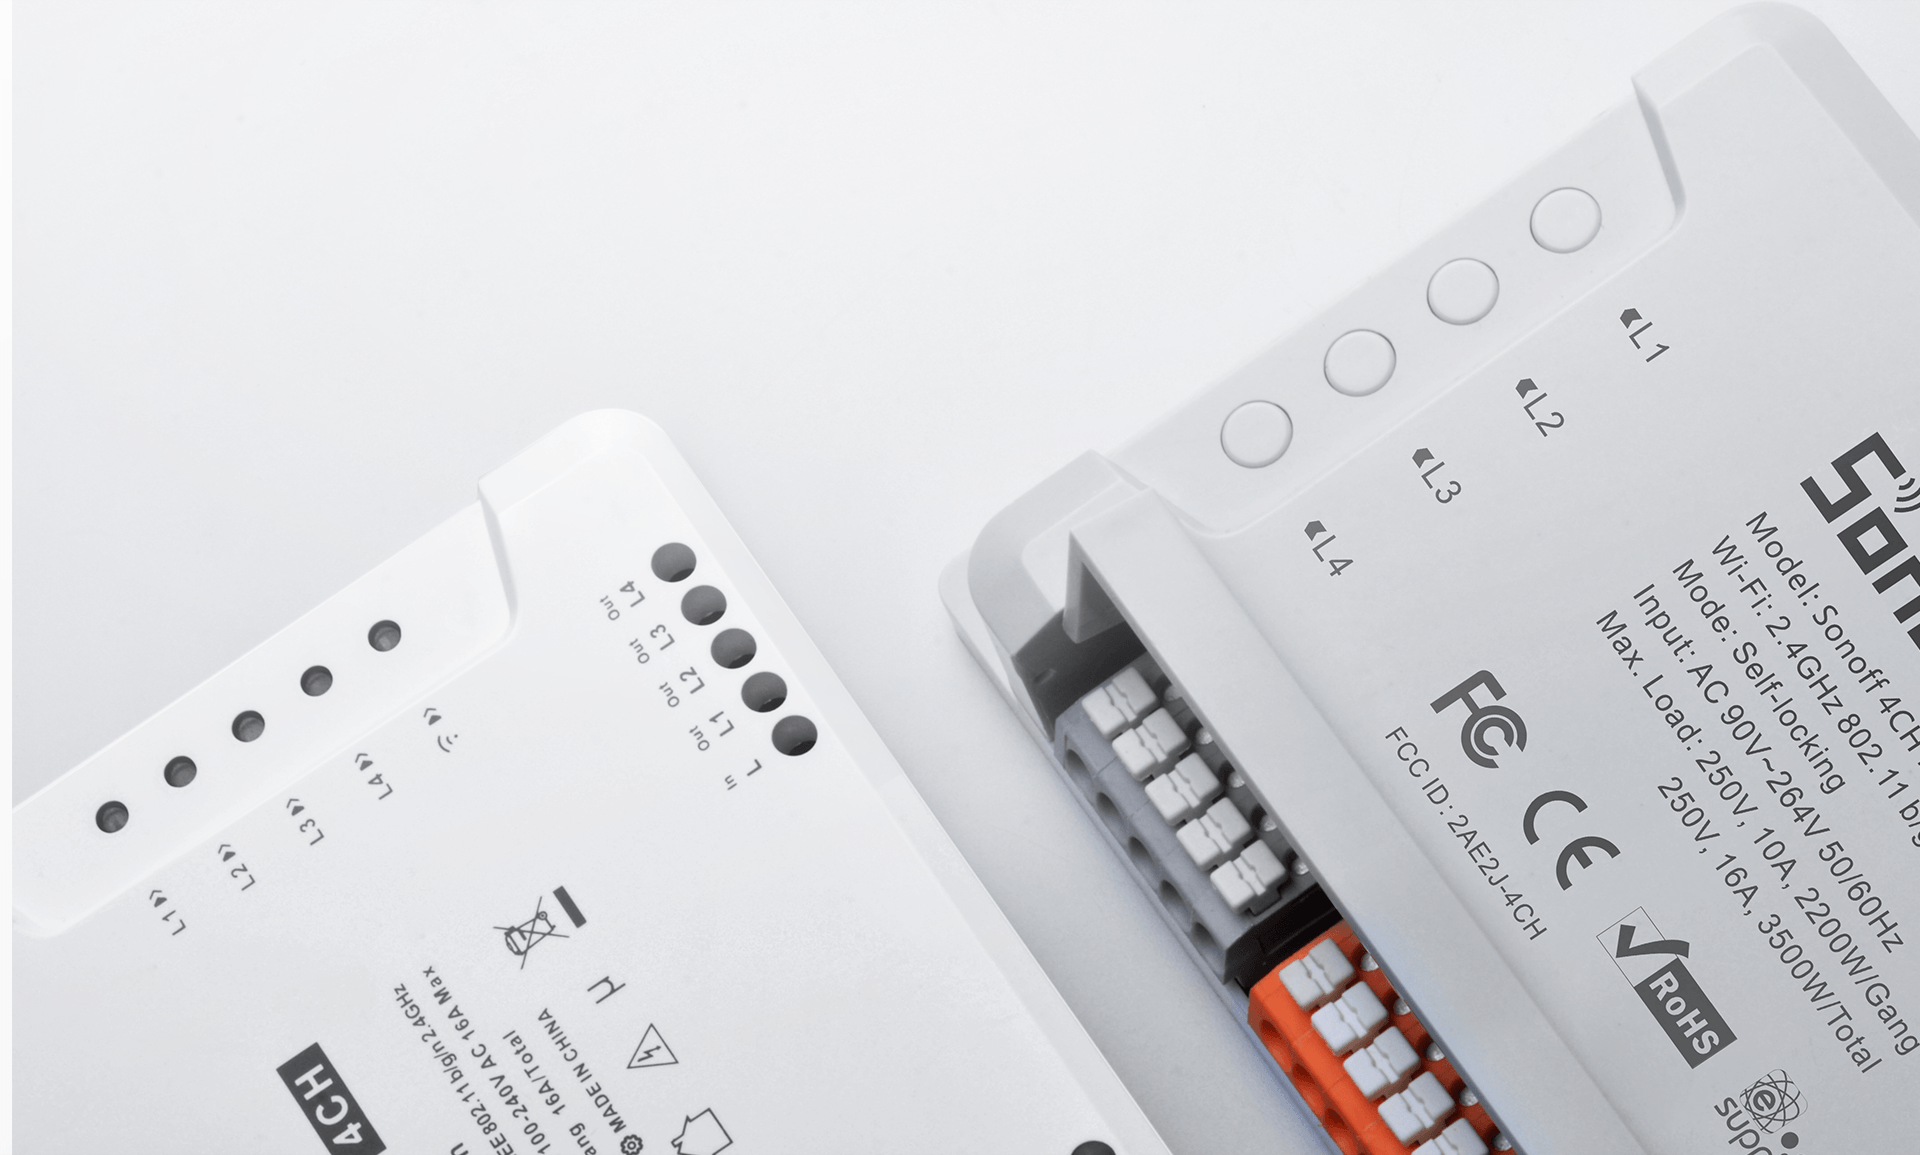
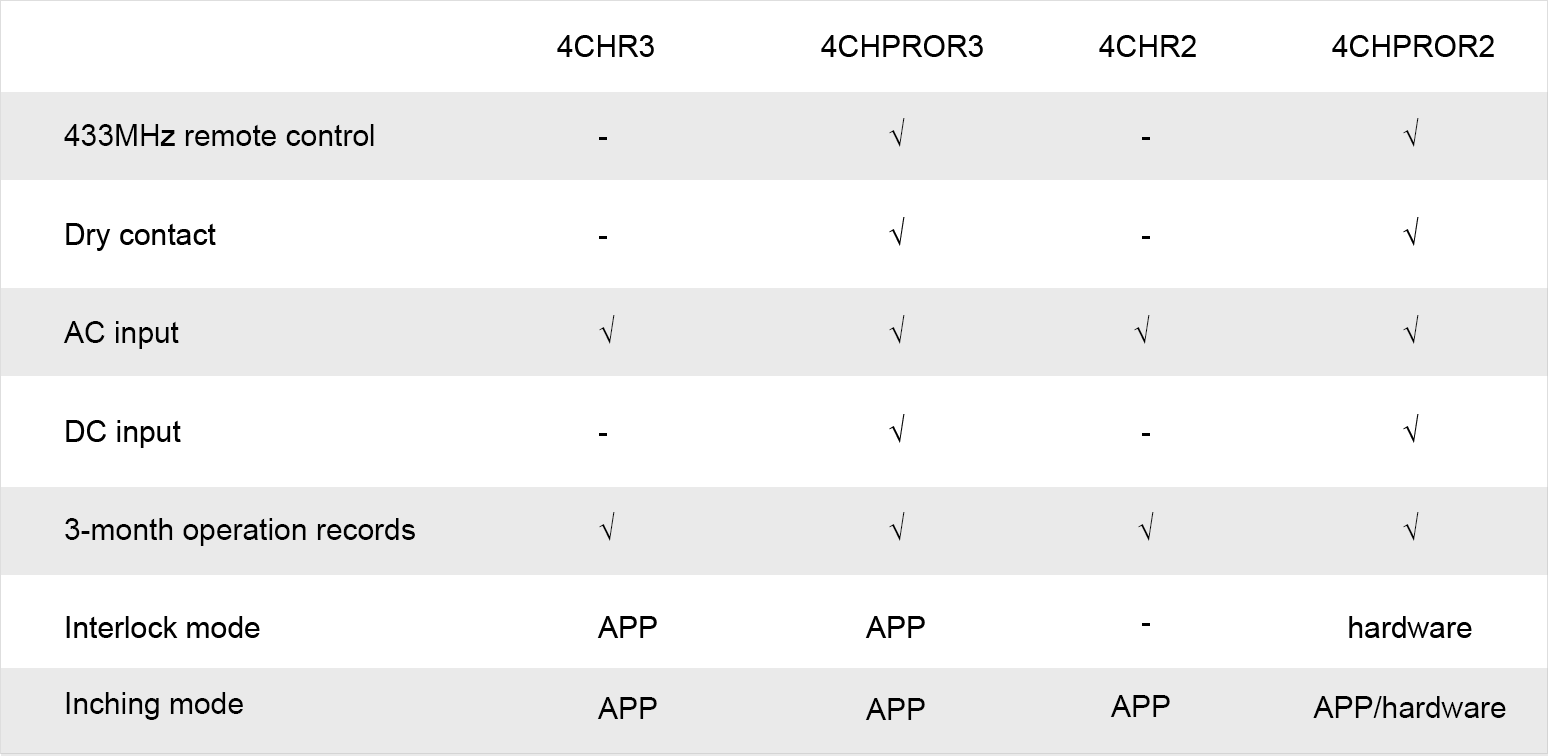
4CHR3 Wiring Guide
Warning
To avoid electric shocks, please consult a qualified professional electrician for help when installing and repairing. Don’t do the wiring with the power on!
Requirements
In order to complete the wiring process without a problem, please confirm the following items before doing the wiring.
1. Live and Neutral wires are necessary to power 4CHR3. It can’t work without “Neutral”.
2. If it is a three-phase circuit, please use Neutral and select one of the Live cables to make it a single-phase input.
3. Please confirm the input voltage. 4CHR3 works with 100-240V AC input voltage.
4. Please confirm the parameters of the load going to be connected. The operating current should be less than 10A/Gang(15A/Total). The operating power should be less than 2200W/Gang(3500W/Total). If it is an inductive load, please confirm the rush current instead of the operating current.
5. Please confirm the cable diameter, it must be within the range below. 24-14AWG or 0.5-1.5mm²
Instructions
1. Connect with a light/switch:
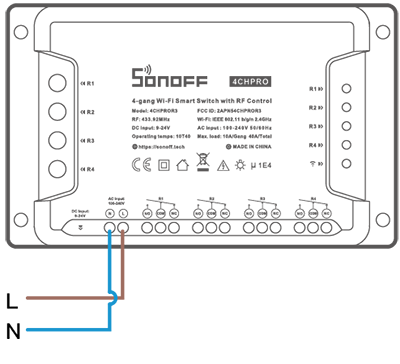
2. Connect with an AC motor:
Note:
1. If the load requires ground (G) connection, the ground (G) of the load should be connected directly with the main ground (G) of the house circuit.
4CHR3 FAQ
1. What’s the working current limit of the load
10A/Gang, 15A/Total.
2. What’s the working power limit of the load?
2200W/Gang, 3500W/Total.
3. Can it work with inductive loads?
It’s not recommended. The rush current will destroy the device.
4. Is it reached any waterproof rate?
No, it is not waterproof.
5. Can it learn 433MHz RF remote controllers?
No, it can’t.
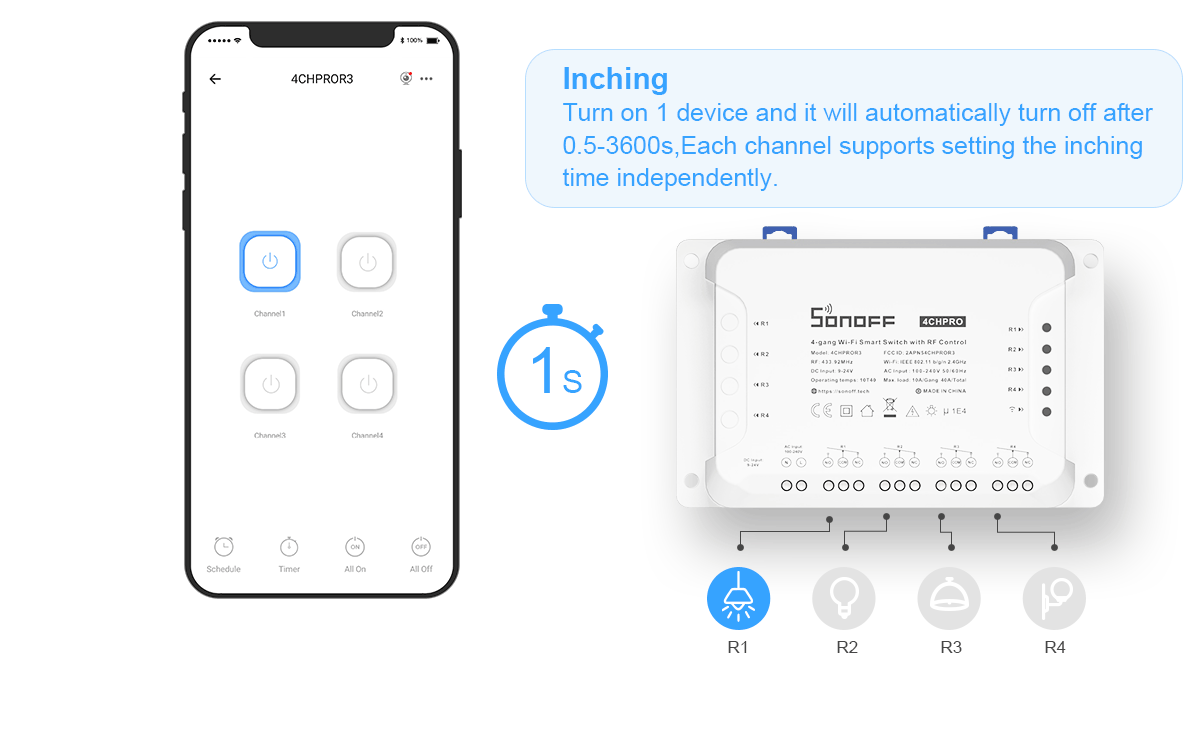
6. Can I set different inching time for different channels?
Yes.
7. Does it support loop timer?
No.
8. How many historical operation records can be saved?
Three months’ records.
9. Does it support LAN control?
Yes. Should be firmware V3.0.1&eWeLink V3.9.0 or above.
10. What function does it support in LAN mode?
Turn on/off; Set power-on state; Set inching; Turn off network indicator.
11. Can it work with IFTTT?
Yes.
12. Can it work with Alexa/Google Assistant?
Yes.
13. Does it support DIY mode?
No.
14. Can I set inching and interlock at the same time?
No, if interlock is enabled, inching will be shielded.
15. When setting up a scene, can I set channel 1 as “condition” while channel 2 as “perform”?
No, the same device can’t be set as condition&perform at the same time.
4CHPROR3 Wiring Guide
Warning
To avoid electric shocks, please consult a qualified professional electrician for help when installing and repairing. Don’t do the wiring with the power on!
Requirements
In order to complete the wiring process without a problem, please confirm the following items before doing the wiring.
1. If it is a three-phase circuit, please use Neutral and select one of the Live cables to make it a single-phase input.
2. Please confirm the input voltage. 4CHPROR3 works with 100-240V AC or 9-23V DC input voltage.
3. Please confirm the parameters of the load going to be connected. The operating current should be less than 10A/Gang(40A/Total). The operating power should be less than 2200W/Gang(8800W/Total). If it is an inductive load, please confirm the rush current instead of the operating current.
4. Please confirm the cable diameter, it must be within the range below. 24-14AWG or 0.5-1.5mm²
Instructions
1. DC input
2. AC input
Note:
1. It can be powered by either 100-240V AC or 9-23V DC.
2. Please choose one of the methods above.
3. It’s a dry contact switch. The input is only used for powering 4CHPROR3, not for the loads.
Output:
1. light&switch
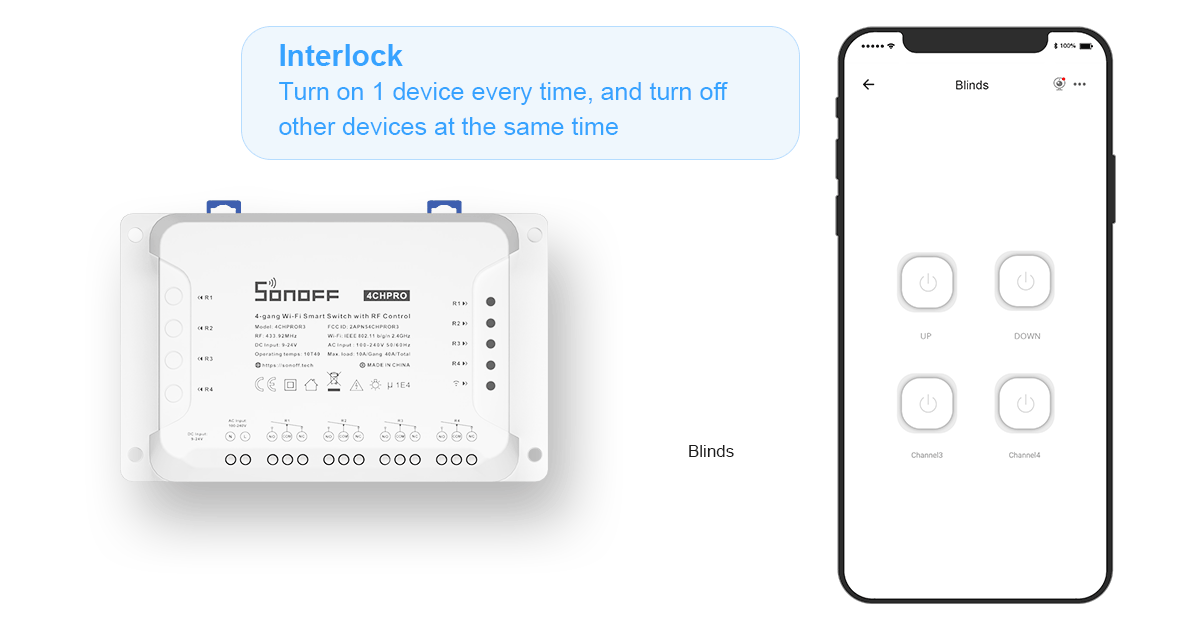
2. DC motor (Interlock mode should be activated)
3. AC motor (Interlock mode should be activated)
Note:
1. Input wires are omitted in the output diagram.
2. The input&output are separate, it can be powered by a DC input and connect with AC loads and vice versa.
3. If the load requires ground (G) connection, the ground (G) of the load should be connected directly with the main ground (G) of the house circuit.
4CHPROR3 FAQ
1. What’s the working current limit of the load?
10A/Gang, 40A/Total.
2. What’s the working power limit of the load?
2200W/Gang, 8800W/Total.
3. Can it work with inductive loads?
It’s not recommended. The rush current will destroy the device.
4. Is it reached any waterproof rate?
No, it is not waterproof.
5. How many 433MHz RF remote buttons can it learn?
4/Gang.
6. Can I set different inching time for different channels?
Yes.
7. Does it support loop timer?
No.
8. How many historical operation records can be saved?
Three months’ records.
9. Does it support LAN control?
Yes. Should be firmware V3.0.1&eWeLink V3.9.0 or above.
10. What function does it support in LAN mode?
Turn on/off; Set power-on state; Set inching; Turn off network indicator.
11. Can it work with IFTTT?
Yes.
12. Can it work with Alexa/Google Assistant?
Yes.
13. Does it support DIY mode?
No.
Troubleshooting
“Timer does not be executed” issue
1. Please check the interlock function is enable or not. Timer and Interlock function are conflicted.
2. Make sure the timers you set are enable.
Note:
1. The maximum quantities of timers: 20
2. The maximum quantities of activated timers: 8
3. It is not recommended that the device work offline for a long time. If the device has been paired with eWeLink but stayed offline for a long time, it may cause the device restarted issue and the timer will not be executed. thus, keeping the device online and check whether the issue is solved.
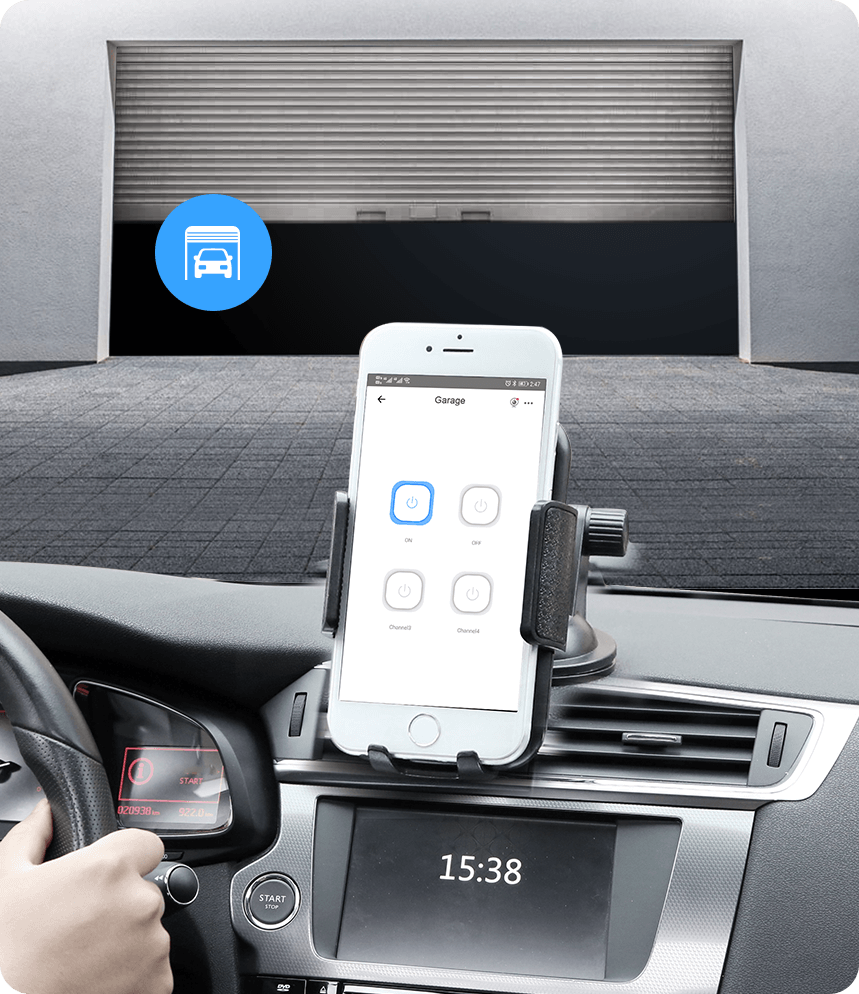
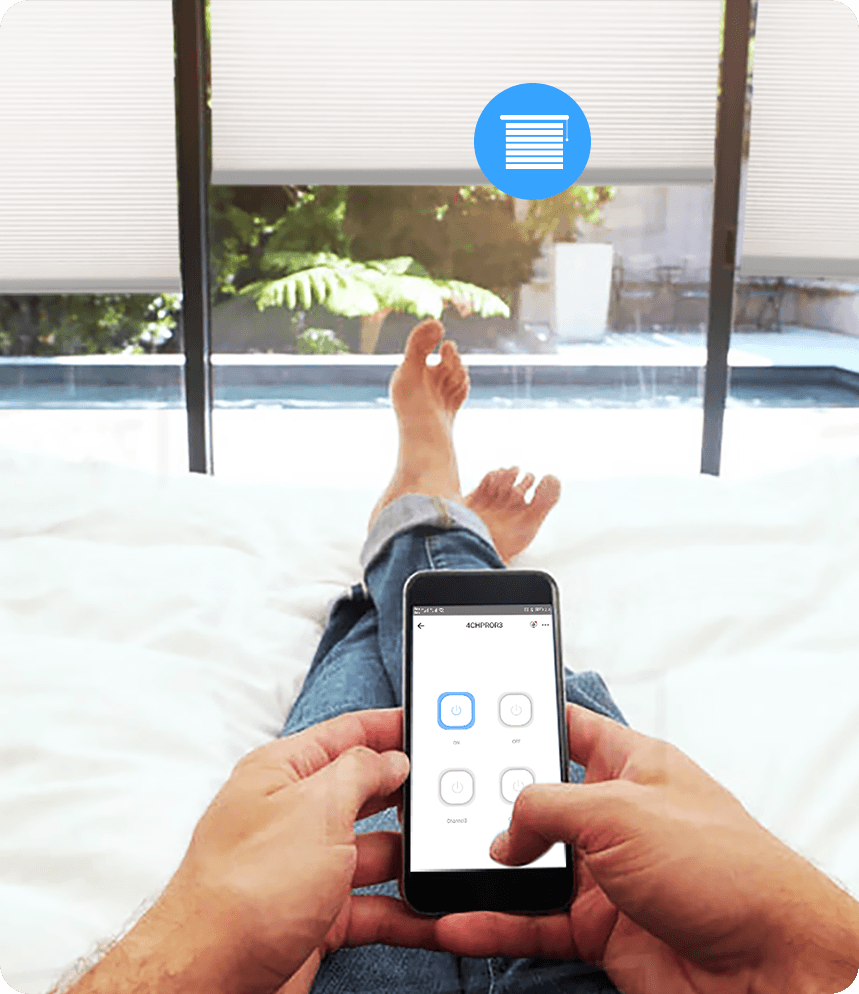
How to use 4CHPROR3 to control my blinding or garage door?
For the 4CHPROR3 products, all the four channel switches are dry contact, it can be used for AC and DC Electric Motor.
| Motor Type | Motor Wire | 4CHPROR3 Max Load |
| AC Electric Motor |  | 10A/2200W/Gang |
| DC Electric Motor |  | 10A/2200W/Gang |
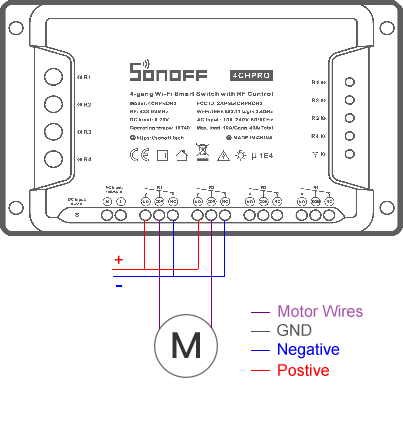
AC Electric Motor connected to 4CHPROR3 wiring guide:
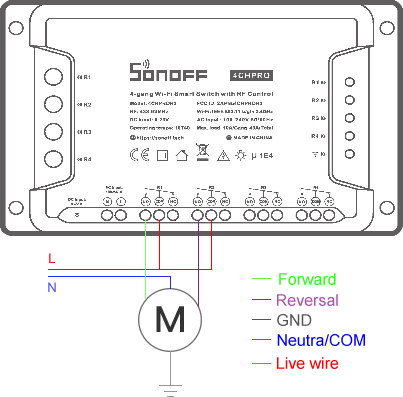
DC Electric motor connected to 4CHPROR3 wiring guide:
Note:
1. Above diagrams did not show the power supply for the 4CHPROR3.
2. The AC motor wiring guide shows forward direction connects to CH1, reversal direction connects to CH2, you also can connect the forward/reversal direction to the channel that you like to use.
3. Device must be set in interlock mode while connecting with motor as above shown.
4. When the device is in interlock, the Timer function is not available.
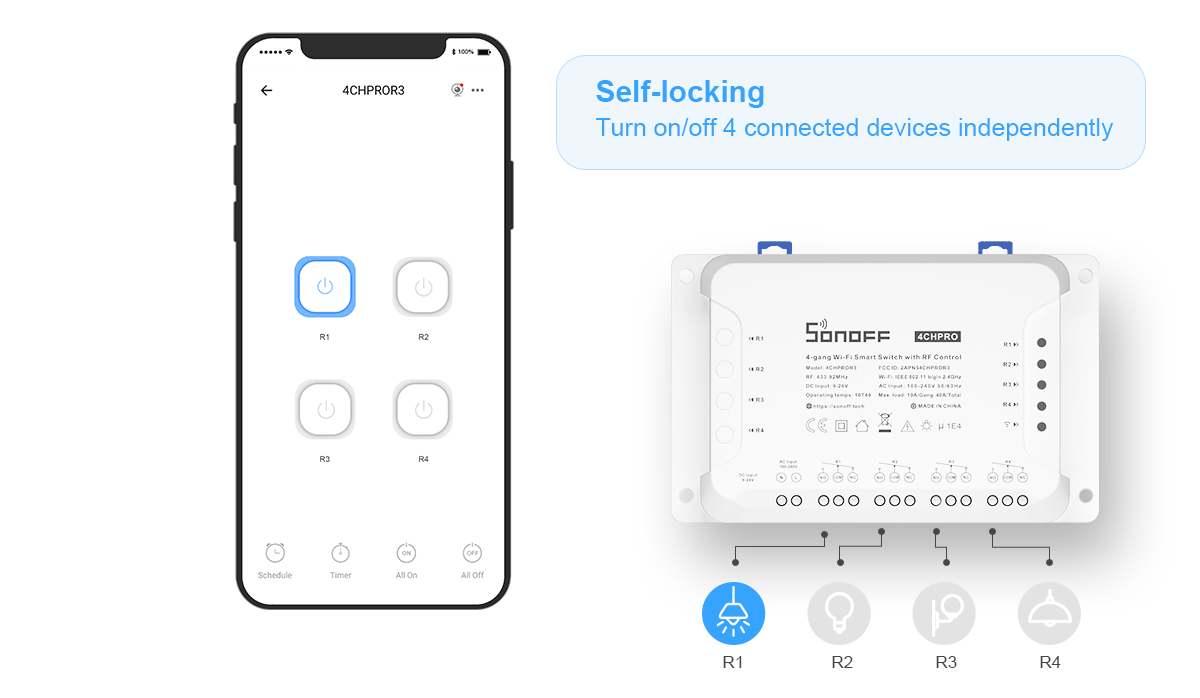
5. when interlock is activated, all four channels are in interlock mode, it is impossible to set two channel with interlock while the other two channel with self-locking mode.
Please check the following problems by the LED indicator status:
The LED indicator flashes once on repeated means you fail to connect to the router.
1. Maybe you entered a wrong Wi-Fi SSID and password.
2. Maybe your router has a lower carrying capacity.
3. Maybe you place device in a space with a weak Wi-Fi signal.
4. Be sure that the MAC of the device is not in the black list of your MAC management.
The LED indicator flashes twice on repeated means you fail to connect to the server.
1. Make sure Internet connection is working.
2. Please contact your ISP and confirm our server address is not shielded:
cn-disp.coolkit.cc (China Mainland)
as-disp.coolkit.cc (in Asia except China)
eu-disp.coolkit.cc (in EU)
us-disp.coolkit.cc (in US)
If none of the above methods solved this problem, please submit your request via help&feedback on eWeLink APP.
Device pairing failed issue
1. Make sure device is in the pairing mode.
2. Make sure your Wi-Fi network runs on 2.4GHz band. Please try Compatible Pairing Mode (AP) or upgrade eWeLink APP to 4.0.0 version or higher if you use a dual-band router.
3. Make sure you entered a correct Wi-Fi SSID and password, no special characters contained.
4. The device shall get close to the router for a good transmission signal condition while pairing.